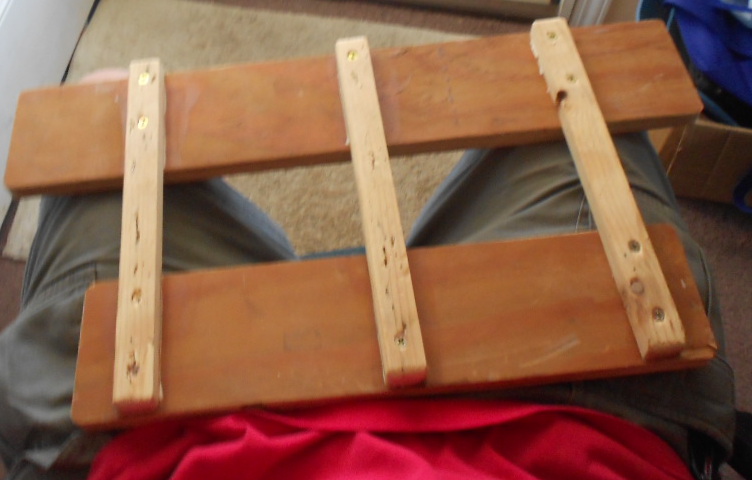
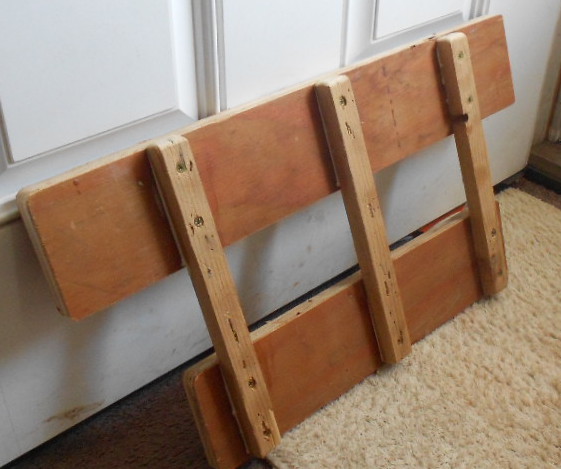
So far as I am concerned, this design is public domain. That’s because the objective of this exercise is not the specific construction, nor the design, but the process of designing. I’ve built a couple of these and everybody loves them. The other one has metal stringers on top, made from those slotted wall-mount shelf brackets (essentially a metal “C” rail with various holes and slots cut into it). I applied duct tape to the rails to prevent scratching anything. Wooden rails as depicted here remove the need for that.
Here’s what I was thinking: It has to sit stable in my lap, fit between the arms of the office chair, yet be wide enough at the knees for a relaxed posture. It needs to keep the heat of laptop away from my body, and room to breath is a good thing. Not too heavy would be nice, but the surfaces have to be smooth to the touch and not catch on things.
So you can see the planks are a decent grade of plywood, which is simply a matter of what I had on hand. Thicker would be a bit much to handle, but if you have lighter material that you don’t mind in your lap, use what makes you happy. The near plank is narrow enough to fit between chair arms, while the far plank allows my to relax my legs.
To smooth the edges, I took the wood out to a concrete sidewalk and dragged the pieces across the surface under pressure so that the concrete sanded down the edges. If you are using slender wood stringers, I recommend you pre-drill the screw holes to prevent splitting. I also glued them down to create a solid feel. The whole thing was measured by holding the pieces of wood in place where I intended to use them. The placement of the stringers was a matter of matching more-or-less the width of the laptop in question.
You can paint it, coat it with other materials, use whatever types of fastening suits you. The trick in stuff like this is having a good feel for what a piece of material can and cannot do, and being aware of how things can go wrong if you don’t prevent trouble.
Oh, and if you really need a mousepad on one side, I recommend you learn how to cut and fold corrugated cardboard. The brown side is perfect for most optical pointers. I made one that simply fit snugly on the extended end of the outer plank. It extended it out and toward me a bit larger than the end of the plank. A resulting 4″ square should do. Most mobile pointers are more accelerated than desktop models, so it takes less space to operate. I folded the cardboard around the back edge, then brought it up around the plank and folded to meet the extended underside on the edge closest to me. Then I stapled it down so that it was solid. Adding one more layer of cardboard on top hid the staples and added some much needed stiffness. It’s basically a rectangular hollow tube of cardboard with a stiff top.
Enjoy!


